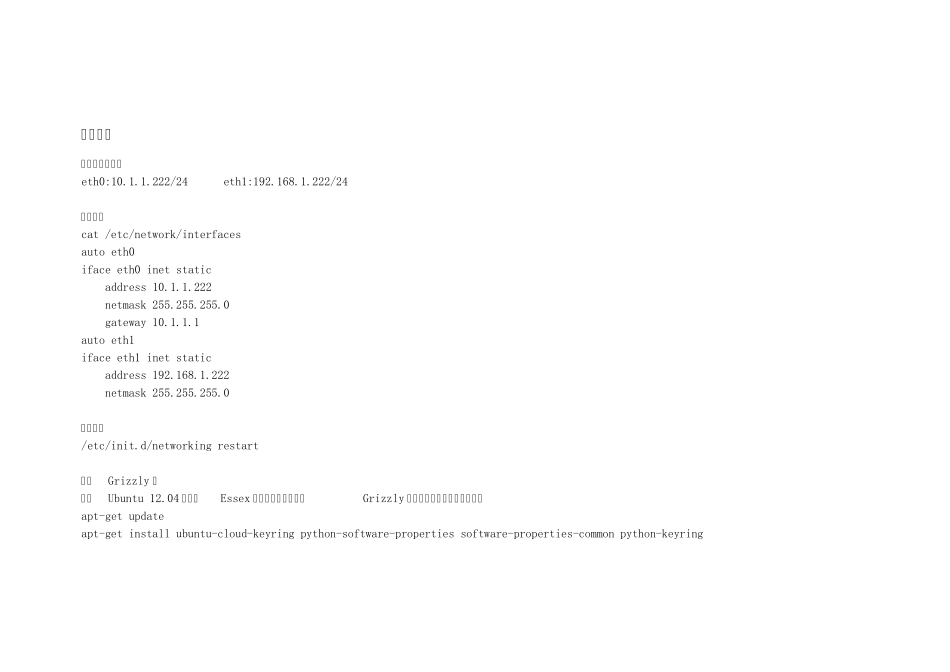
控制节点 控制节点信息: eth0:10.1.1.222/24 eth1:192.168.1.222/24 网络设置 cat /etc/network/interfaces auto eth0 iface eth0 inet static address 10.1.1.222 netmask 255.255.255.0 gateway 10.1.1.1 auto eth1 iface eth1 inet static address 192.168.1.222 netmask 255.255.255.0 重启网络 /etc/init.d/networking restart 添加Grizzly 源 默认Ubuntu 12.04 的源是Essex 版本,我们需要增加Grizzly 的源。不过需要你手工添加。 
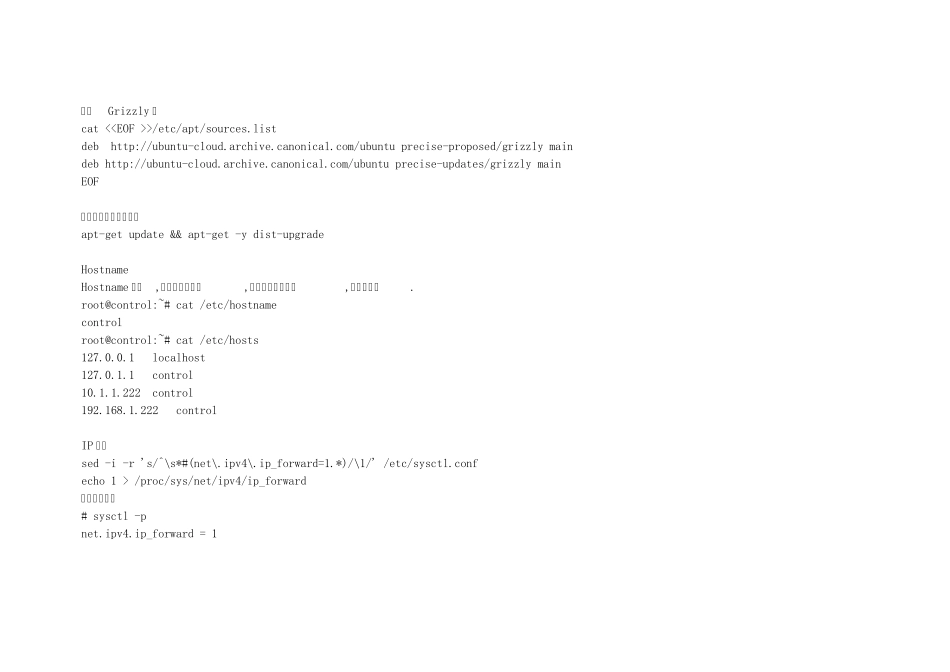
apt-get update apt-get install ubuntu-cloud-keyring python-software-properties software-properties-common python-keyring 添加Grizzly 源 cat <>/etc/apt/sources.list deb http://ubuntu-cloud.archive.canonical.com/ubuntu precise-proposed/grizzly main deb http://ubuntu-cloud.archive.canonical.com/ubuntu precise-updates/grizzly main EOF 运行下面命令进行更新 apt-get update && apt-get -y dist-upgrade Hostname Hostname 设置,其实不是必须的,不过养成一个习惯,也方便自己
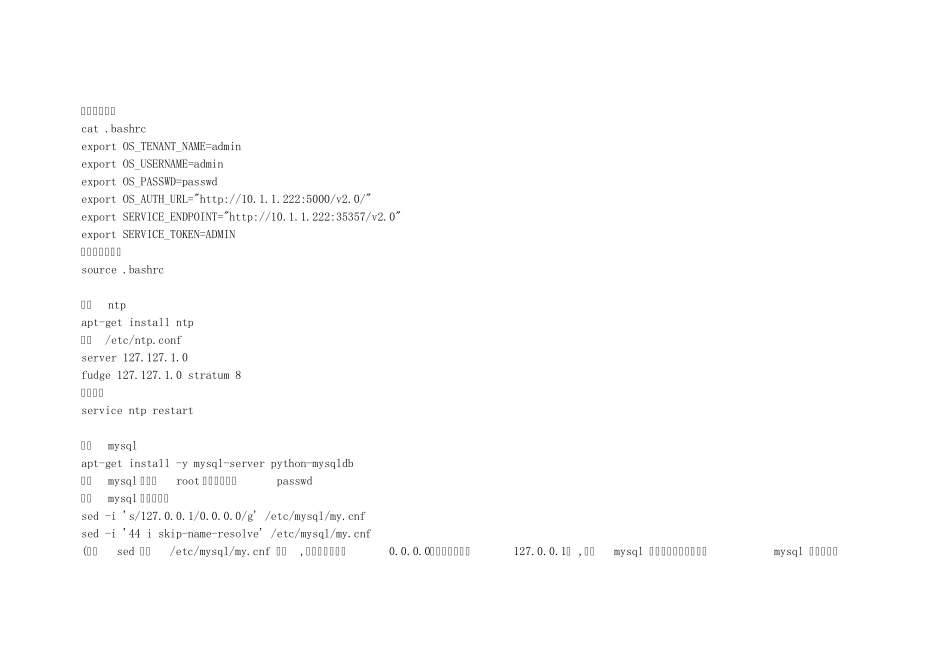
. root@control:~# cat /etc/hostname control root@control:~# cat /etc/hosts 127.0.0.1 localhost 127.0.1.1 control 10.1.1.222 control 192.168.1.222 control IP 转发 sed -i -r 's/^\s*#(net\.ipv4\.ip_forward=1.*)/\1/' /etc/sysctl.conf echo 1 > /proc/sys/net/ipv4/ip_forward 检查修改结果 # sysctl -p net.ipv4.ip_forward = 1 添加环境变量 cat .bashrc export OS_TENANT_NAME=admin export OS_USERNAME=admin export OS_PASSWD=passwd export OS_AUTH_URL="http://10.1.1.222:5000/v2.0/" export SERVICE_ENDPOINT="http://10.1.1.222:35357/v2.0" export SERVICE_TOKEN=ADMIN 使环境变量生效 source .bashrc 安装ntp apt-get install ntp 编辑/etc/ntp.conf server 127.127.1.0 fudge 127.127.1.0 stratum 8 启动服务 service ntp restart 安装mysql apt-get install -y mysql-server python-mysqldb 配置mysql 账户,root 的登录密码为passwd 配置mysql 监听地址: sed -i 's/127.0.0.1/0.0.0.0/g' /etc/mysql/my.cnf sed -i '44 i skip-name-resolve' /etc/mysql/my.cnf (使用sed 编辑 /etc/mysql/my.cnf 文件,更改...