实验一:Android 用户界面(1)一、实验目的1
熟悉Android应用程序开发环境的构建过程,了解Android应用程序的文件结构,学会进行Android应用程序开发
理解Android用户界面的基本概念,掌握TextView、EditText、Button、ImageButton、Checkbox、RadioButton、Spinner、ListView等常用控件的使用
了解Android系统的6种界面布局,掌握线性布局、框架布局、表格布局、相对布局、绝对布局、网格布局等界面布局的使用
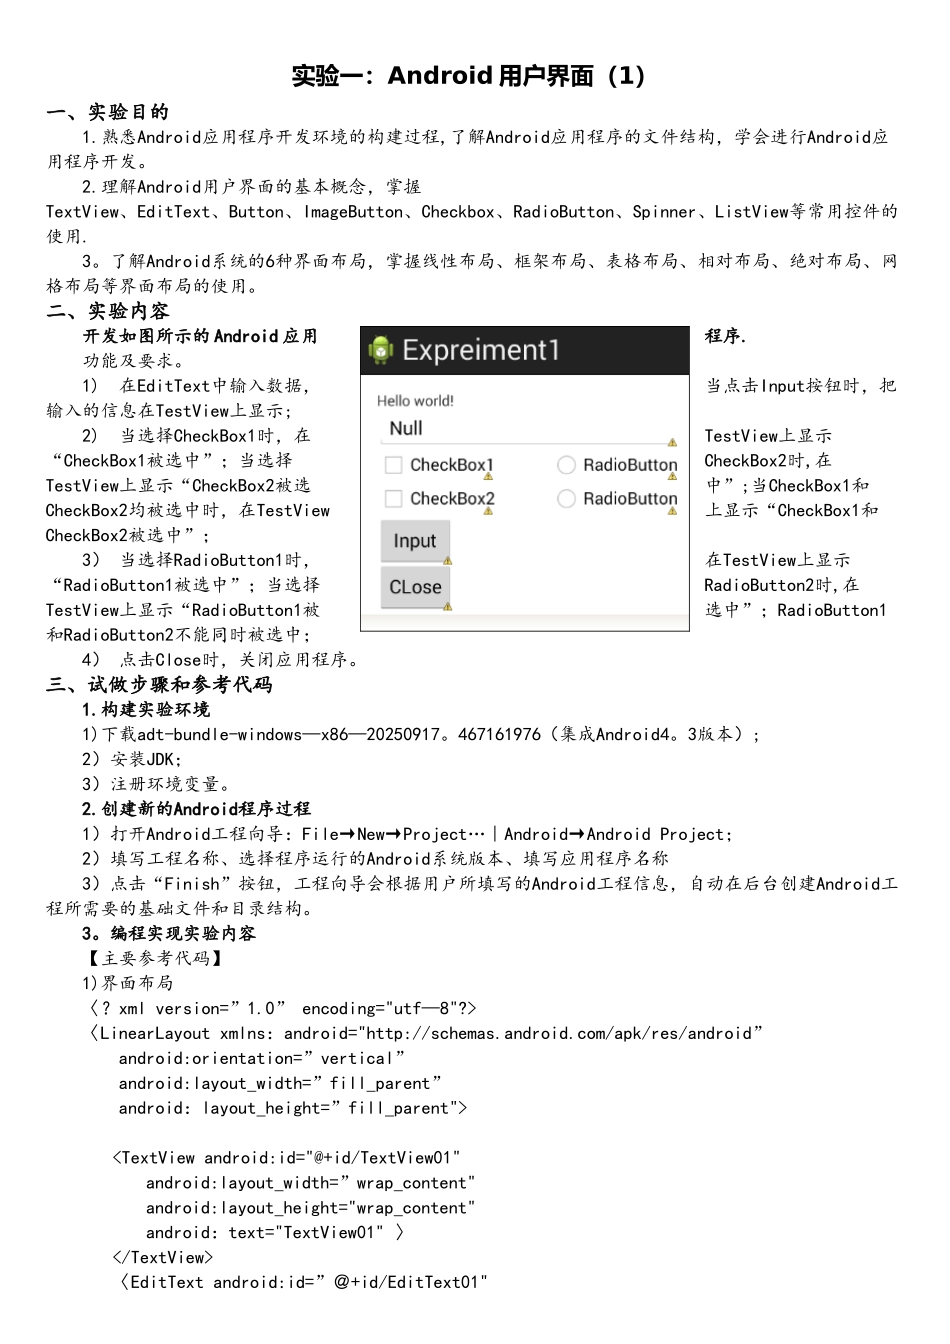
二、实验内容开发如图所示的 Android 应用程序
1) 在EditText中输入数据,当点击Input按钮时,把输入的信息在TestView上显示;2) 当选择CheckBox1时,在TestView上显示“CheckBox1被选中”;当选择CheckBox2时,在TestView上显示“CheckBox2被选中”;当CheckBox1和CheckBox2均被选中时,在TestView上显示“CheckBox1和CheckBox2被选中”;3) 当选择RadioButton1时,在TestView上显示“RadioButton1被选中”;当选择RadioButton2时,在TestView上显示“RadioButton1被选中”;RadioButton1和RadioButton2不能同时被选中;4) 点击Close时,关闭应用程序
三、试做步骤和参考代码1
构建实验环境1)下载adt-bundle-windows—x86—20250917
467161976(集成Android4
3版本);2)安装JDK;3)注册环境变量
创建新的Android程序过程1)打开Android工程向导:File→New→Project…︱Android→Android Pr