电脑桌面
添加小米粒文库到电脑桌面
安装后可以在桌面快捷访问

LED显示屏安装规范VIP免费

LED显示屏安装规范_第1页
1/8
LED显示屏安装规范_第2页
2/8
LED显示屏安装规范_第3页
3/8
P18 窗帘屏安装规范 PH18 curtain LED screen installation direction 一.屏体组装零件清单(components list ): 1.单元屏-主箱体 ( cabinet) 2.
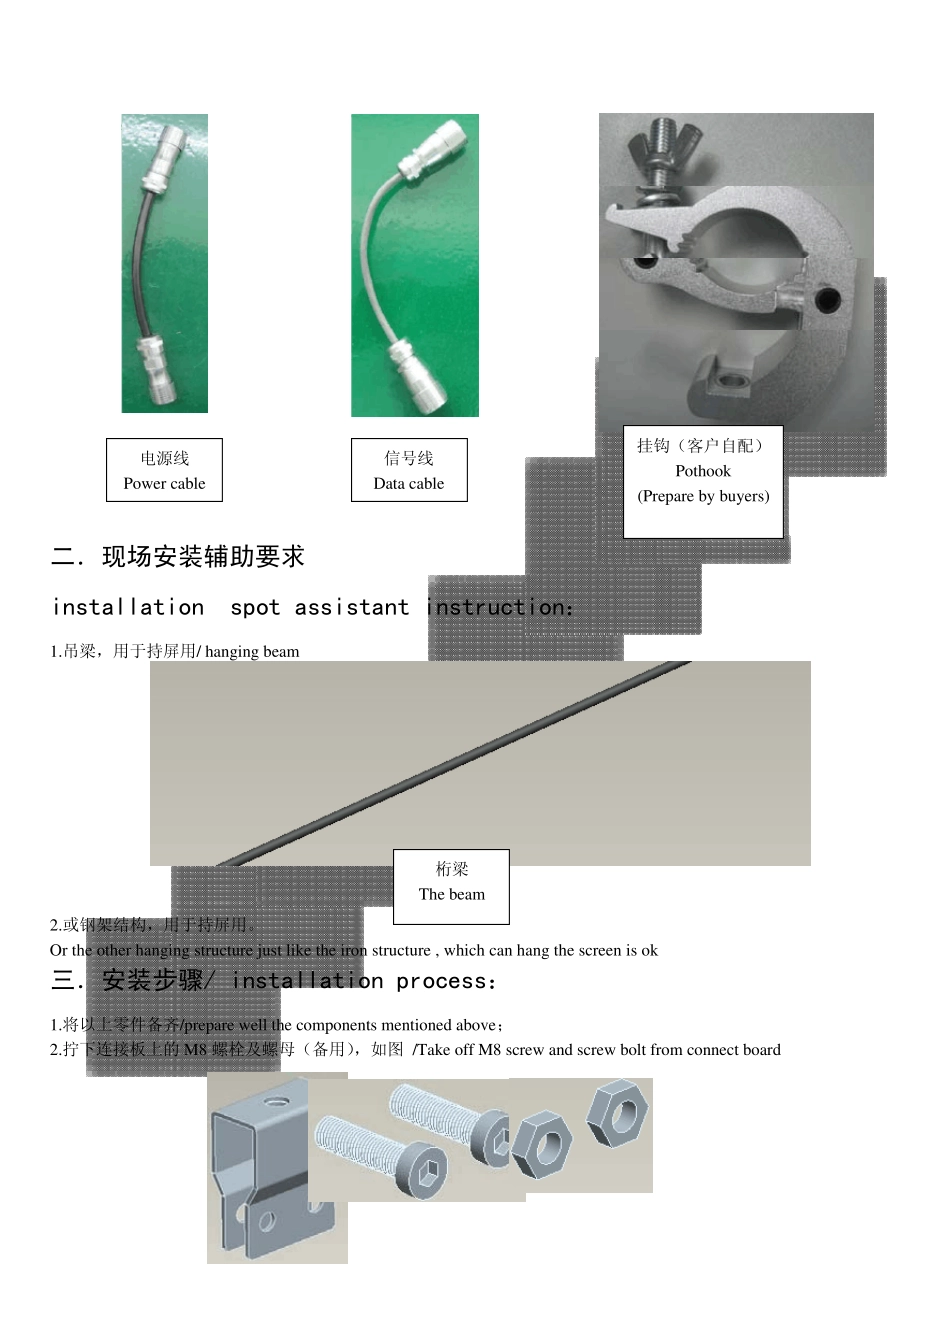
配件 ( parts ) 锁盒 (Latch) 屏体正面 (front view) 屏体侧面(side view) 连接板 (connect board) M10 内六角螺栓(M10 inner hexagon screw) 屏体侧面(side view) 二.现场安装辅助要求 installation spot assistant instruction: 1.吊梁,用于持屏用/ hanging beam 2.或钢架结构,用于持屏用。 Or the other hanging structure just like the iron structure , which can hang the screen is ok 三.安装步骤/ installation process: 1.将以上零件备齐/prepare well the components mentioned above; 2.拧下连接板上的 M8 螺栓及螺母(备用),如图 /Take off M8 screw and screw bolt from connect board 电源线 Power cable 信号线 Data cable 桁梁 The beam 挂钩(客户自配) Pothook (Prepare by buyers) 3.依次将锁盒扣在屏体的定位座上;如图 Please lock them on the screen , follow the picture By press this ,lock it Orientation backshaft 4.将连接板锁在锁盒上,如图 lock the connector board 定位座的支撑轴 通过按压此处的滑板,使定位座的支撑轴穿过锁盒,此时滑板自动复位, ( 包 括 在内)通过按压此处的滑板使滑板的大孔与锁盒的大孔同心,将连接板用2-M8 螺栓及螺母与锁盒组立在一起 press spring till to have concentric circle with that hole, use 2-M8 screw bolt and screw lock connector with Latch. 5.将挂钩紧固在桁梁的合适位置上;如图 /prepare well the hang 6.用M10 内六角螺栓连接挂钩及连接板,并用扳手扭紧;如图 / screw it 7.将锁盒按前面讲述的方式继续安装,如图/ Connect the hang and the screen panel by the latch 8.取下一个单元屏将其扣在上一个锁盒里面,如图 Connect two cabinets by the latch 9.重复上一个动作将所需的单元屏组立,如图 All the cabinets connection are the same , see the pictures f 1 0 .第二、三、四、五、六列的屏体安装均依第一列的安装方式进行,安装后如图; 四.接线方式: 电源输入/Pow er input 电源输出/Pow er output 信号输入Signal input 信号输出Signal output 电源线Pow er cale 信号线(signal cable) 电源进线pow er input 信号进线signal input 电源进线pow er input 电源进线pow er input 电源进线pow er input 电源进线pow er input 电源进线pow er input 信号串接在相邻的屏里 signal connect betw een each column

1、当您付费下载文档后,您只拥有了使用权限,并不意味着购买了版权,文档只能用于自身使用,不得用于其他商业用途(如 [转卖]进行直接盈利或[编辑后售卖]进行间接盈利)。
2、本站所有内容均由合作方或网友上传,本站不对文档的完整性、权威性及其观点立场正确性做任何保证或承诺!文档内容仅供研究参考,付费前请自行鉴别。
3、如文档内容存在违规,或者侵犯商业秘密、侵犯著作权等,请点击“违规举报”。

碎片内容

LED显示屏安装规范

确认删除?
VIP
微信客服
  • 扫码咨询
会员Q群
  • 会员专属群点击这里加入QQ群
客服邮箱
回到顶部