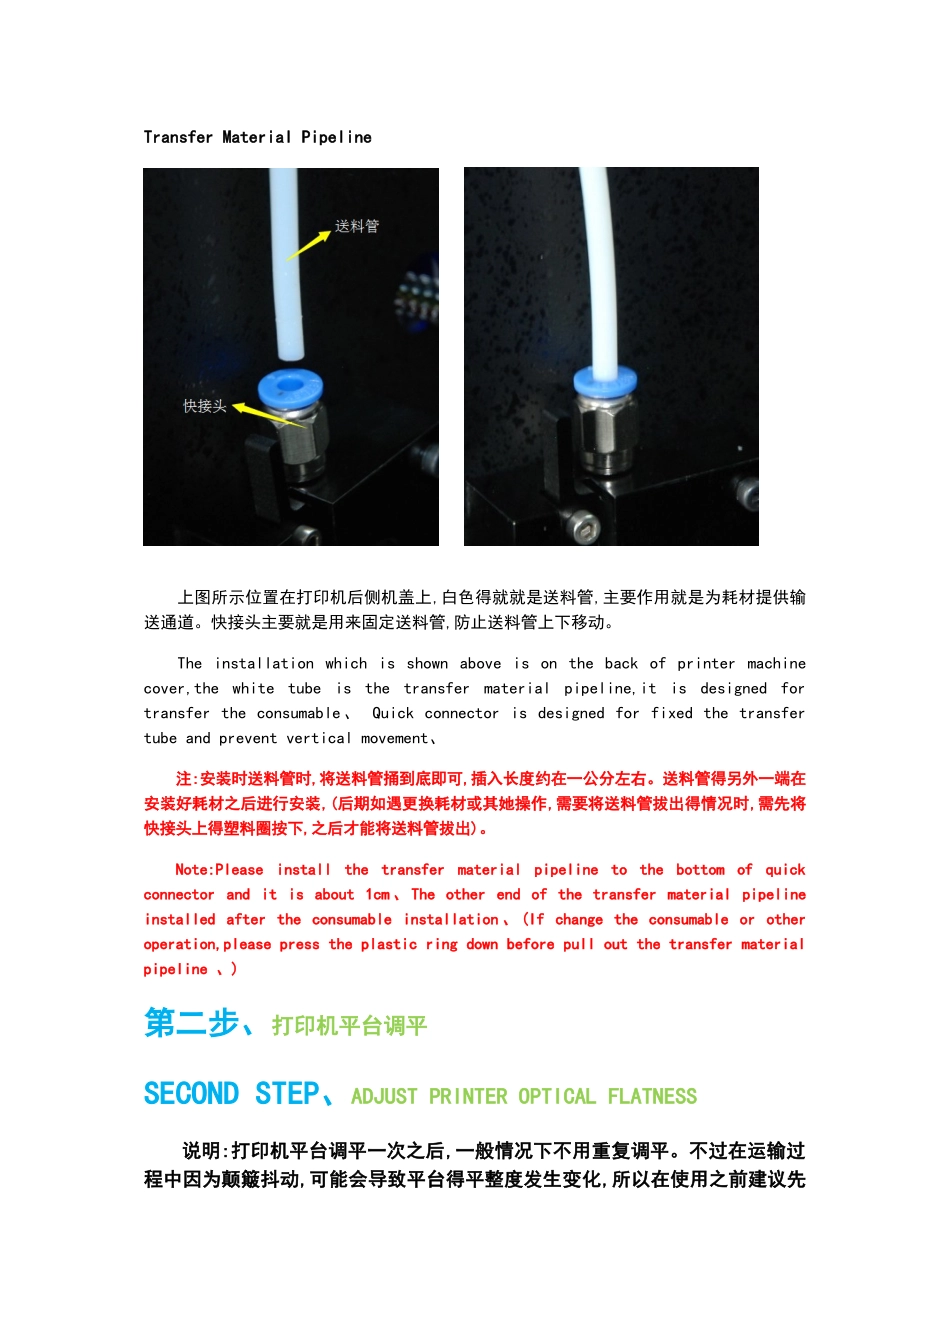
第一步、打印机组装FIRST STEP 、 PRINTER ASSEMBLY1、耗材托架得安装1 、 Installation of Consumable Bracket上组图中,左图为耗材托架,右图为耗材托架得安装位 置 ,安装位置在打印机后侧机盖上。As shown above,left picture is consumable bracket,and the right picture is Installation location of the consumable bracket which is on the back of printer machine cover、2、送料管得安装2 、 Installation of 3D 打印机 操作手册 3D PRINTERMANUAL NSTRUCTION 202515[版]Transfer Material Pipeline 上图所示位置在打印机后侧机盖上,白色得就就是送料管,主要作用就是为耗材提供输送通道。快接头主要就是用来固定送料管,防止送料管上下移动。The installation which is shown above is on the back of printer machine cover,the white tube is the transfer material pipeline,it is designed for transfer the consumable、 Quick connector is designed for fixed the transfer tube and prevent vertical movement、注:安装时送料管时,将送料管捅到底即可,插入长度约在一公分左右。送料管得另外一端在安装好耗材之后进行安装,(后期如遇更换耗材或其她操作,需要将送料管拔出得情况时,需先将快接头上得塑料圈按下,之后才能将送料管拔出)。Note:Please install the transfer material pipeline to the bottom of quick connector and it is about 1cm 、 The other end of the transfer material pipeline installed after the consumable installation 、 (If change the consumable or other operation,please press the plastic ring down before pull out the transfer material pipeline 、)第二步、打印机平台调平SECOND STEP、ADJUST PRINTER OPTICAL FLATNESS说明:打印机平台调平一次之后,一般情况下不用重复调平。不过在运输过程中因为颠簸抖动,可能会导致平台得平整度发生变化,所以在使用之前建议先进行检查调平操作。Instruction:Usually you do not need to adjust the optical flatness after first adjustment、we remend to check the status caused by transportation、1、调平前准备1. Adjustment Ready、首先检查喷嘴,保证喷嘴外表面干净,没...


