下载后可任意编辑Ubuntu 10.04 TLS 下 Nagios3.4.
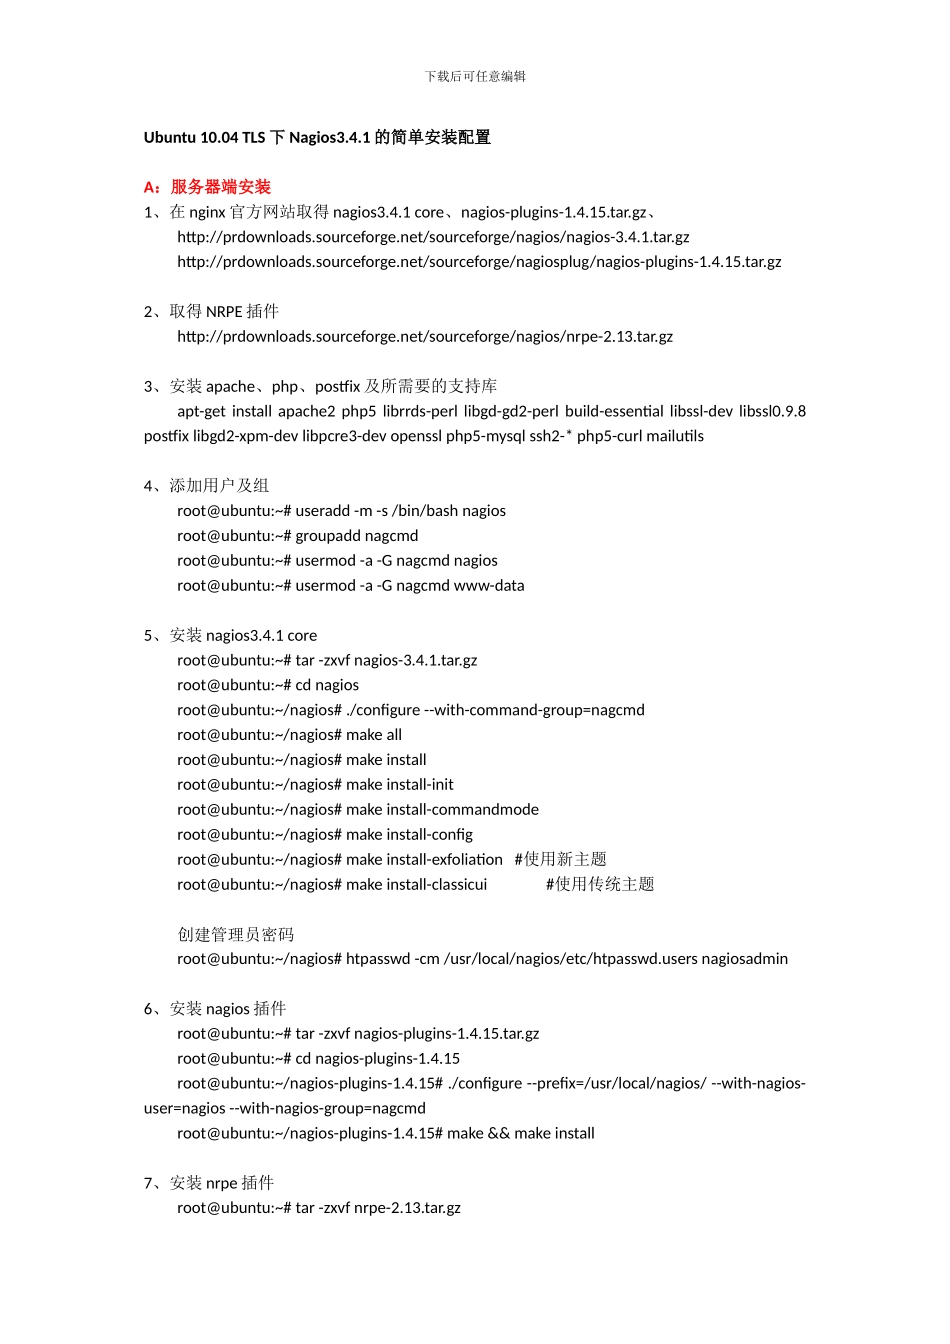
1 的简单安装配置A:服务器端安装1、在 nginx 官方网站取得 nagios3.4.1 core、nagios-plugins-1.4.15.tar.gz、http://prdownloads.sourceforge.net/sourceforge/nagios/nagios-3.4.1.tar.gzhttp://prdownloads.sourceforge.net/sourceforge/nagiosplug/nagios-plugins-1.4.15.tar.gz2、取得 NRPE 插件http://prdownloads.sourceforge.net/sourceforge/nagios/nrpe-2.13.tar.gz3、安装 apache、php、postfix 及所需要的支持库apt-get install apache2 php5 librrds-perl libgd-gd2-perl build-essential libssl-dev libssl0.9.8 postfix libgd2-xpm-dev libpcre3-dev openssl php5-mysql ssh2-* php5-curl mailutils4、添加用户及组root@ubuntu:~# useradd -m -s /bin/bash nagiosroot@ubuntu:~# groupadd nagcmdroot@ubuntu:~# usermod -a -G nagcmd nagiosroot@ubuntu:~# usermod -a -G nagcmd www-data5、安装 nagios3.4.1 coreroot@ubuntu:~# tar -zxvf nagios-3.4.1.tar.gzroot@ubuntu:~# cd nagiosroot@ubuntu:~/nagios# ./configure --with-command-group=nagcmdroot@ubuntu:~/nagios# make allroot@ubuntu:~/nagios# make installroot@ubuntu:~/nagios# make install-initroot@ubuntu:~/nagios# make install-commandmoderoot@ubuntu:~/nagios# make install-configroot@ubuntu:~/nagios# make install-exfoliation #使用新主题 root@ubuntu:~/nagios# make install-classicui#使用传统主题创建管理员密码root@ubuntu:~/nagios# htpasswd -cm /usr/local/nagios/etc/htpasswd.users nagiosadmin6、安装 nagios 插件root@ubuntu:~# tar -zxvf nagios-plugins-1.4.15.tar.gzroot@ubuntu:~# cd nagios-plugins-1.4.15root@ubuntu:~/nagios-plugins-1.4.15# ./configure --prefix=/usr/local/nagios/ --with-nagios-user=nagios --with-nagios-group=nagcmdroot@ubuntu:~/nagios-plugins-1.4.15# make && make install7、安装 nrpe 插件root@ubuntu:~# tar -zxvf nrpe-2.13.tar.gz下载后可任意编辑root@ubuntu:~/nrpe-2.13# ./configure --prefix=/usr/local/nagios/root@ubuntu:~/nrpe-2.13# make allroot@ubuntu:~/nrpe-2.13# make install-plugin8、添加开机启动root@ubuntu:~# upd...