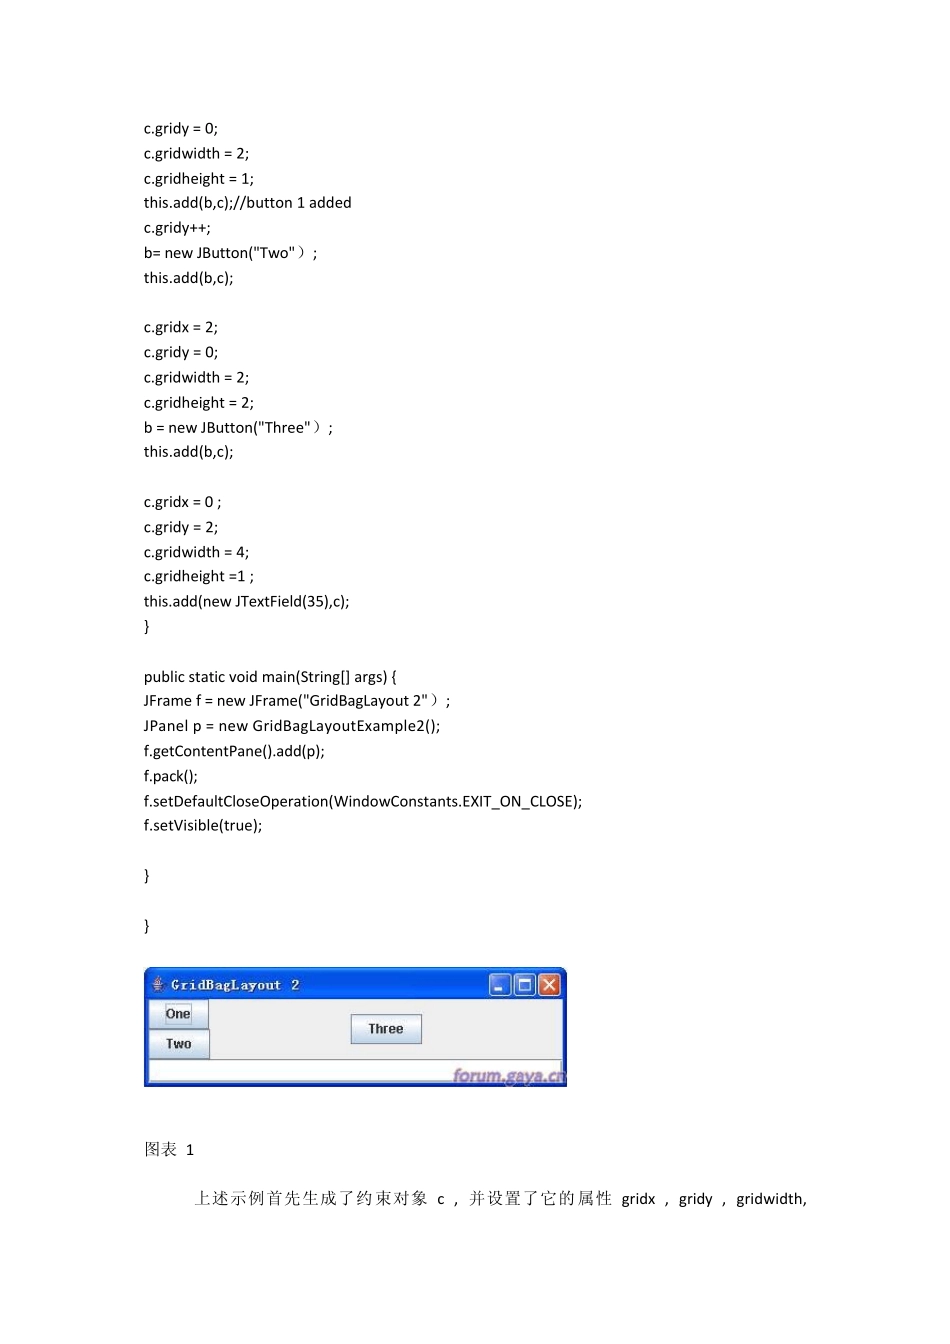
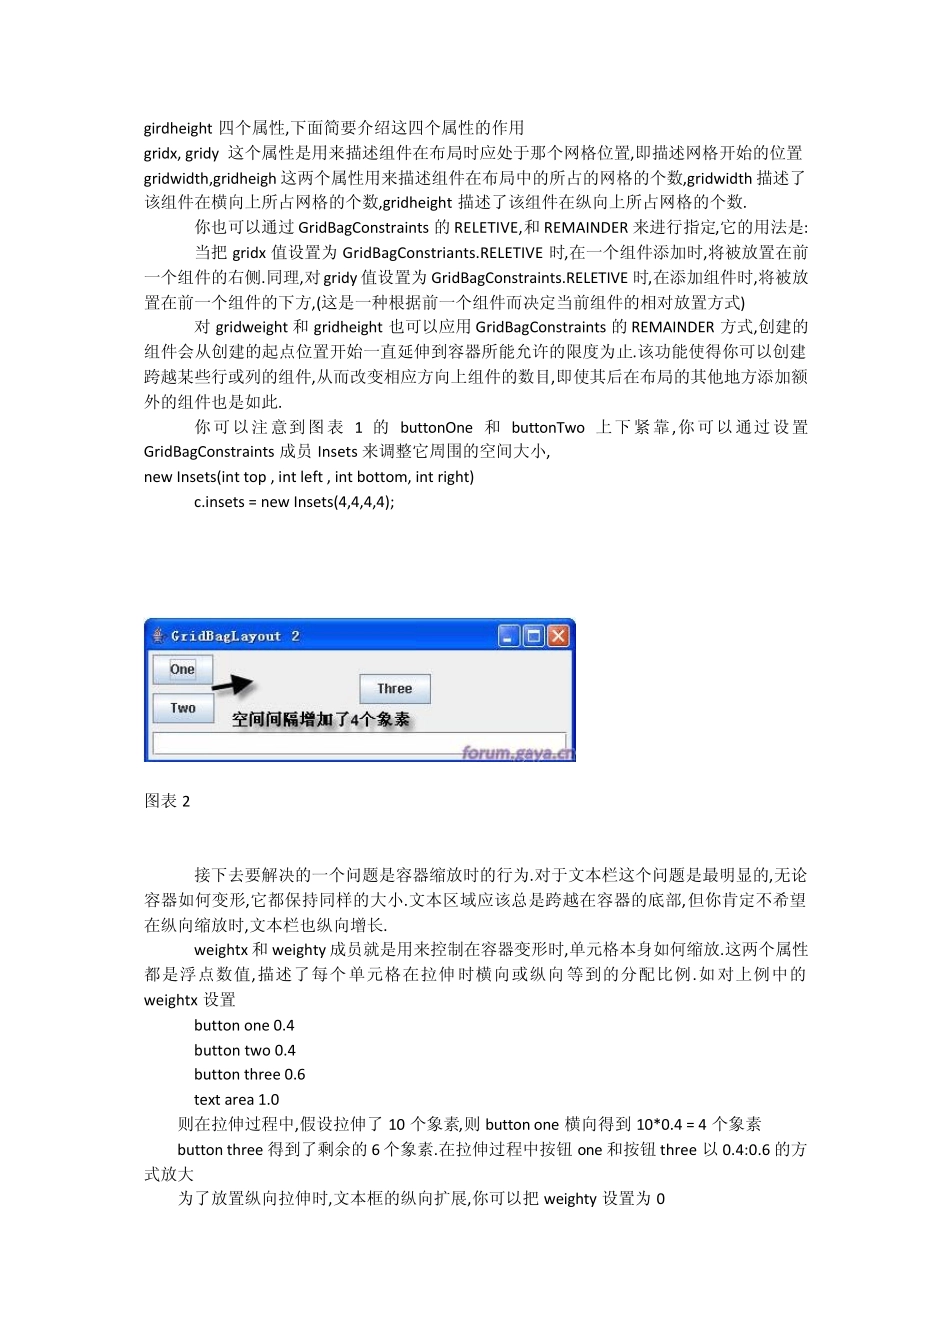
网 袋 布 局 管 理 器 --GridBagLayout使 用 介绍 GridBagLayout 【常用构造函数】 public GridBagLayout() 【特点】: GridBagLayout 是所有AWT 布局管理器当中最复杂的,同时他的功能也是最强大的.这种现象源于它所提供的众多的可配置选项,你几乎可以完全地控制容器的布局方式.尽管复杂性很明显,只要理解了基本思想,就很容易使用GridBagLayout 了. GridBagLayout 从它的名字中你也可以猜到,它同GridLayout 一样,在容器中以网格形式来管理组件.但GridBagLayout 功能要来得强大得多. 1、GridBagLayout 管理的所有行和列都可以是大小不同的. 2、GridLayout 把每个组件限制到一个单元格,而 GridLayout 并不这样:组件在容器中可以占据任意大小的矩形区域, GridBagLayout通常由一个专用类来对他布局行为进行约束,该类叫GridBagConstraints.其中的所有成员都是public 的,因此要学好如何使用GridBagLayout 首先要了解有那些约束变量,以及如何设置这些约束变量. 以下是GridBagConstraints 的公有成员变量 public int anchor public int fill public gridheight Public gridweight public girdx public gridy public Insets insets public int ipadx public int ipady public double weightx public double weighty 看起来有很多约束需要进行设置,但事实上许多约束只需设置一次,并对多个组件重用,每次添加组件时只有少数的项需要修改. 下面是一个具有简单约束的GridBagLayout 示例 public class GridBagLayoutExample2 extends JPanel { public GridBagLayoutExample2() { this.setLayout(new GridBagLayout()); this.setOpaque(true); GridBagConstraints c = new GridBagConstraints(); JButton b = new JButton ("One"); c.gridx = 0 ; c.gridy = 0; c.gridwidth = 2; c.gridheight = 1; this.add(b,c);//button 1 added c.gridy++; b= new JButton("Two"); this.add(b,c); c.gridx = 2; c.gridy = 0; c.gridwidth = 2; c.gridheight = 2; b = new JButton("Three"); this.add(b,c); c.gridx = 0 ; c.gridy = 2; c.gridwidth = 4; c.gridheight =1 ; this.add(new JTextField(35),c); } public static void main(String[] args) { JFrame f = new JFrame("GridBagLayout 2"); JPanel ...


