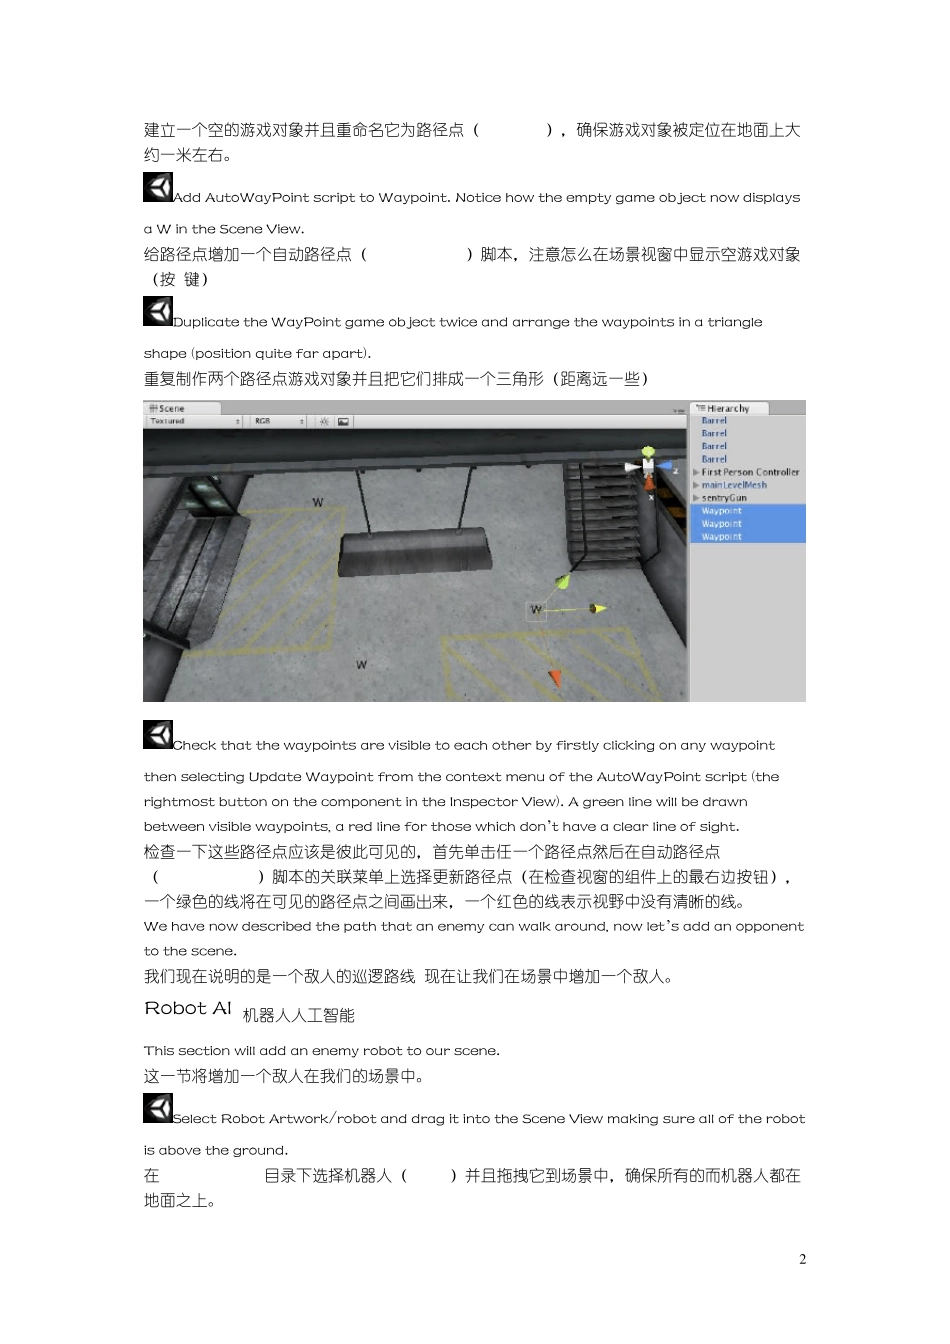
1 FPS 游戏教程3 Part 3: Advanced FPS 第三部分 高级FPS This advancedlevel tutorial extends upon the previous FPS tutorials by introducing game elements such as waypoints, enemy AI, ragdolls and animation. 这个高级教程是原先FPS教程的延伸,介绍游戏元素,例如路径点、敌人AI,布偶和动画。 Prerequisites 先决条件 This tutorial assumes that you are familiar with the Unity interface and basic scripting concepts. Additionally, you should already be familiar with the concepts discussed in Part 1 and 2 of the FPS tutorial series. 这个指南已经默认了你已经熟悉了Unity界面和基本的脚本概念。你已经熟悉了第一部分和第二部分的FPS概念的讨论。 Setting up设置 We’re going to build upon the previous FPS tutorial, so we’ll begin by opening that: 我们将延伸我们的FPS教程,让我们开始吧: Open the previous project (FPS Tutorial 2). 打开原先的项目(FPS 教程 2) Waypoints 路径点 This section will introduce waypoints to our game, these are used to inform the robots of the path that they can walk around. Let’s add three waypoints to our game: 这一节将介绍路径点到我们游戏中,即告知机器人它们能够在周围巡逻的路径,让我们增加三个路径点到我们游戏中: Create an empty game object and rename this to Waypoint. Make sure the game object is placed approximately one meter above the ground level. 2 建立一个空的游戏对象并且重命名它为路径点(Waypoint),确保游戏对象被定位在地面上大约一米左右。 Add AutoWayPoint script to Waypoint. Notice how the empty game object now displays a W in the Scene View. 给路径点增加一个自动路径点(AutoWayPoint)脚本,注意怎么在场景视窗中显示空游戏对象(按W键) Duplicate the WayPoint game object twice and arrange the waypoints in a triangle shape (position quite far apart). 重复制作两个路径点游戏对象并且把它们排成一个三角形(距离远一些) Check that the waypoints are visible to each o...


